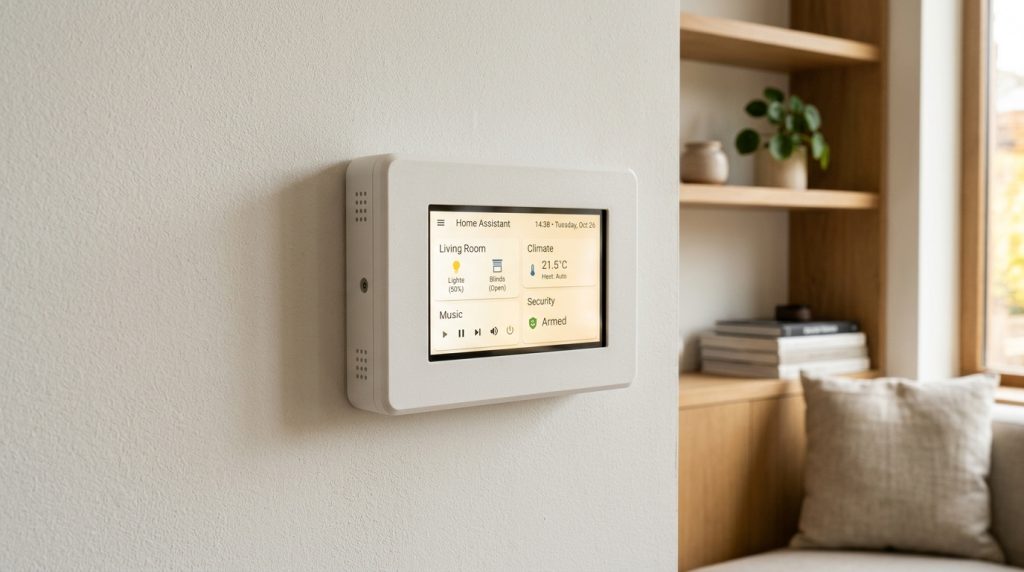
Deploying a local home automation server is merely the foundation of a modern smart home. True living convenience arrives when family members and guests can control lights, climate, and media directly from a permanent wall-mounted interface without relying on smartphones or complex mobile apps. In the Home Assistant ecosystem, commercial smart screens or tablet mounts are often prohibitively expensive, visually bulky, and power-hungry.
Affectionately dubbed the “CYD” or “Cheap Yellow Display” in the maker community, boards such as the ESP32-2432S028R and ESP32-S3-4848S040 combine a full-color TFT/IPS display, resistive or capacitive touchscreen, and a dual-core ESP32 processor on a single PCB for under $15. In this practical guide, we walk through transforming a CYD board into a responsive, low-power, and customizable Home Assistant touch panel.
Cheap Yellow Display (CYD) Hardware Overview
Available on major electronics marketplaces for a fraction of a commercial tablet’s cost, the standard CYD module integrates several core capabilities on a single board:
- Microcontroller Core: Dual-core Xtensa LX6 or ESP32-S3 clocked at up to 240 MHz with onboard WiFi and BLE.
- Display Panel: 2.8-inch or 4-inch color LCD (driven via ILI9341 or ST7701S controllers, delivering 240×320 or 480×480 resolution).
- Touch Interface: Resistive (XPT2046) or capacitive (GT911) touch digitizer.
- Onboard Peripherals: MicroSD card slot, addressable RGB status LED, photoresistor (LDR) for ambient light sensing, and expansion headers.
For establishing baseline driver and toolchain readiness, review our ESP32 Arduino Setup Guide before flashing your first firmware.
Firmware Architectures: ESPHome vs. openHASP
When selecting a firmware pipeline for the CYD wall controller, two standout open-source ecosystems dominate:
- ESPHome with LVGL: Delivers native, zero-code Home Assistant integration. The modern LVGL component enables responsive buttons, sliders, and telemetry cards driven directly by Home Assistant entity states.
- openHASP / HAswitchplate: Runs an independent UI driven over MQTT using lightweight JSON payloads, allowing remote UI changes without re-flashing the firmware.
Sample ESPHome Display & Touch Configuration
Configuring the ILI9341 display and XPT2046 touch controller in ESPHome requires defining the SPI bus pins and hardware chip selects as shown below:
spi:
  clk_pin: GPIO14
  mosi_pin: GPIO13
  miso_pin: GPIO12

display:
  - platform: ili9xxx
    model: ILI9341
    cs_pin: GPIO15
    dc_pin: GPIO2
    reset_pin: GPIO0
    rotation: 90
    id: cyd_display

touchscreen:
  - platform: xpt2046
    cs_pin: GPIO33
    interrupt_pin: GPIO36
    id: cyd_touch
    calibration:
      x_min: 300
      x_max: 3800
      y_min: 300
      y_max: 3800
Enclosure Design, 3D Printing, and Power Distribution
Transitioning from a benchtop prototype to a permanent architectural installation involves careful mechanical and electrical planning:
- 3D-Printed Wall Mount: For precision-fitting faceplates and snug clip mechanisms, ensure optimal print bed leveling as described in our Ender Bed Calibration Guide. Include passive cooling vents to prevent heat buildup.
- Screen Dimming and Power Savings: Avoid panel burn-in and nighttime glare by utilizing the onboard LDR to dim the backlight to 10% in dark rooms or activate a timeout screen-saver.
- In-Wall Power Delivery: To power the panel from existing junction boxes, utilize isolated mini AC-to-DC step-down converters (such as the Hi-Link HLK-PM01 5V/1A module) rather than running exposed USB cables.
Conclusion
The Cheap Yellow Display offers an unbeatable price-to-performance ratio for dedicated smart home interfaces. When paired with ESPHome and Home Assistant, it eliminates the need for expensive commercial panels while providing total control over your home’s ambiance, climate, and security from any wall in the house.
Sources and References
This tutorial references community documentation and foundational hardware guides: