For over a decade, Ultimaker Cura served as the default slicing software for makers worldwide. However, the emergence of high-speed CoreXY 3D printers and modern Klipper firmware exposed fundamental architectural limitations in legacy slicers. Enter OrcaSlicer—an open-source powerhouse derived from Bambu Studio and PrusaSlicer that integrates native Klipper controls, direct calibration routines, and cutting-edge path planning algorithms into a single unified workspace.
If you are transitioning from Cura to OrcaSlicer, the biggest advantage is OrcaSlicer’s native calibration suite. Instead of manually downloading STL test files, slicing with custom G-code scripts, and hoping temperature layers change correctly, OrcaSlicer generates automated, mathematical calibration prints directly from its top menu.
Key Differences Between Cura and OrcaSlicer Architecture
Understanding how OrcaSlicer organizes profiles is essential before importing your printer settings:
| Feature / Paradigm | Ultimaker Cura | OrcaSlicer |
|---|---|---|
| Profile Separation | Single monolithic profile (Quality + Material intertwined) | Triple independent hierarchy: Printer + Filament + Process |
| Direct Machine Interface | OctoPrint plugin / basic Moonraker integration | Native embedded Moonraker (Mainsail/Fluidd) & Bambu Device tab |
| Automated Calibration | Third-party “AutoTowers” marketplace plugin | Built-in mathematical calibration suite (Temp, Flow, PA, Max Volumetric) |
| Pressure / Linear Advance | Often handled via start G-code or M900 Marlin commands | Saved directly per filament profile and dynamically injected |
| Interface Ergonomics | Collapsible side panel with search filter | Tabbed modern ribbon with color-coded speed / flow visualizer |
Step 1: Running the Built-in Temperature Tower
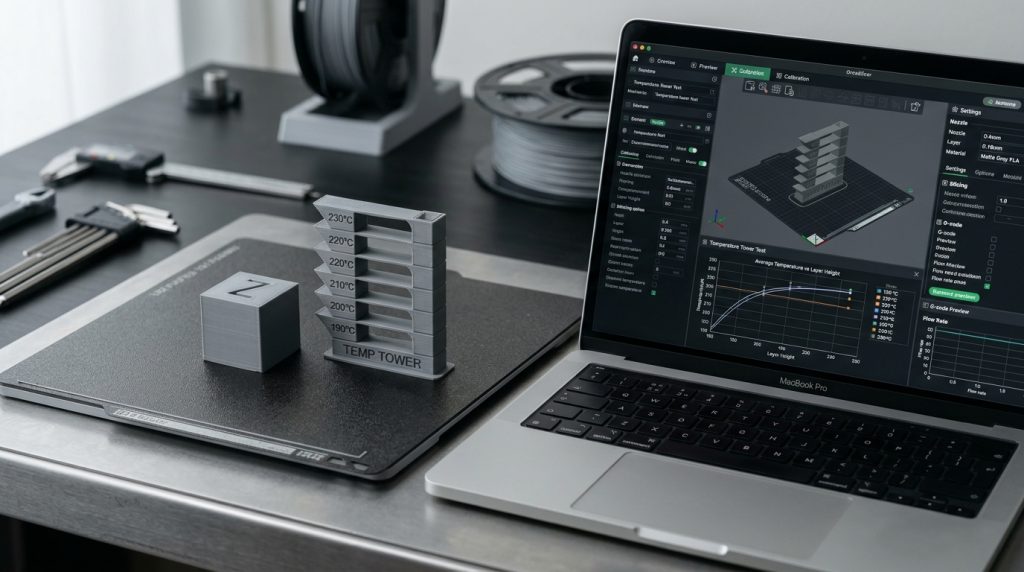
Every filament brand and formulation possesses a distinct glass transition temperature and optimal melt viscosity. OrcaSlicer automates temperature tuning:
- Navigate to the top menu and select Calibration > Temperature.
- Select your material family (e.g., PLA, PETG, ABS) and define the test range (e.g., 220°C down to 190°C in 5°C increments).
- OrcaSlicer automatically constructs the geometry and injects the corresponding layer-change M104/M109 temperature commands.
- Inspect the printed tower for bridging sag, stringing between pillars, and layer adhesion strength by attempting to delaminate the segments with your fingers. Select the temperature that delivers the cleanest overhangs without sacrificing mechanical bond.
Step 2: Dual-Pass Flow Rate Calibration
In Cura, extrusion multiplier is known as “Flow %”. In OrcaSlicer, it is governed by the Flow Ratio in the Filament Profile. OrcaSlicer uses a highly refined dual-pass visual method:
Pass 1 (Coarse Adjustment: ±20%)
Select Calibration > Flow Rate > Pass 1. OrcaSlicer generates 9 test swatches ranging from -20 to +20. Feel the top surfaces with your fingertips. If a swatch feels rough with raised ridges, it is over-extruding. If you feel microscopic valleys or see gaps between extrusion perimeters, it is under-extruding. Pick the smoothest swatch and update your baseline flow ratio:
New Flow Ratio = Current Flow Ratio * (100 + Selected Swatch Number) / 100
Pass 2 (Fine Adjustment: ±9%)
Update your filament profile with the Pass 1 result, then execute Calibration > Flow Rate > Pass 2. This prints swatches with granular 1% increments (-9 to +9). Select the silky-smooth surface that produces zero fingernail friction.
Step 3: Pressure Advance (Klipper / Marlin) Tuning
When an extruder accelerates toward a corner and rapidly decelerates, molten filament inside the meltzone behaves like a spring. Without compensation, corners bulge outward and line starts suffer from starvation. Pressure Advance (PA in Klipper) or Linear Advance (LA in Marlin) compensates for this lag.
OrcaSlicer provides three PA test methods under Calibration > Pressure Advance:
- PA Tower: Prints a hollow square column where PA value increases linearly with Z height. Measure the corner height where bulging and gaps vanish with digital calipers.
- PA Line: A quick 5-minute print executing high-speed speed transitions across single extrusion lines.
- PA Pattern: An angle-bracket test pattern popular for rapid bed visual inspection.
For direct-drive extruders, typical Klipper PA values range between 0.020 and 0.055. For long Bowden tube systems, values typically sit between 0.30 and 0.85.
Step 4: Max Volumetric Flow Speed Limit
The ultimate safeguard in OrcaSlicer is the Max Volumetric Speed (mm³/s) setting. Even if you configure an ambitious print speed of 300 mm/s, your hotend cannot melt plastic faster than its thermal dissipation limit. By setting Max Volumetric Speed (e.g., 12–15 mm³/s for standard V6 hotends, or 25–35 mm³/s for Volcano/high-flow hotends), OrcaSlicer dynamically throttles print speed on wide, thick extrusions to prevent extruder motor skipping and under-extrusion grinding.